Holy smokes, folks! Let me tell you about the absolute game-changer Sledgehammer dropped into Call of Duty: Modern Warfare 3 – the JAK Devastators kit for the Reclaimer 18 shotgun. Back in Season 5, it was just another attachment, but that sneaky Season 6 buff? Man, it flipped the script entirely! This thing went from a pump-action plinker to a pair of semi-auto, akimbo beasts that absolutely melt faces up close. Seriously, the Time-to-Kill (TTK) is downright bonkers now. Whether I'm rushing objectives in Multiplayer or clearing buildings in Warzone, these bad boys have become my go-to when things get tight and personal. It's pure, unadulterated close-quarters carnage, and I'm here for it. Let me break down how to get 'em and how I've built mine to dominate the battlefield in 2025.
🔓 Unlocking the Chaos: Getting the JAK Devastators
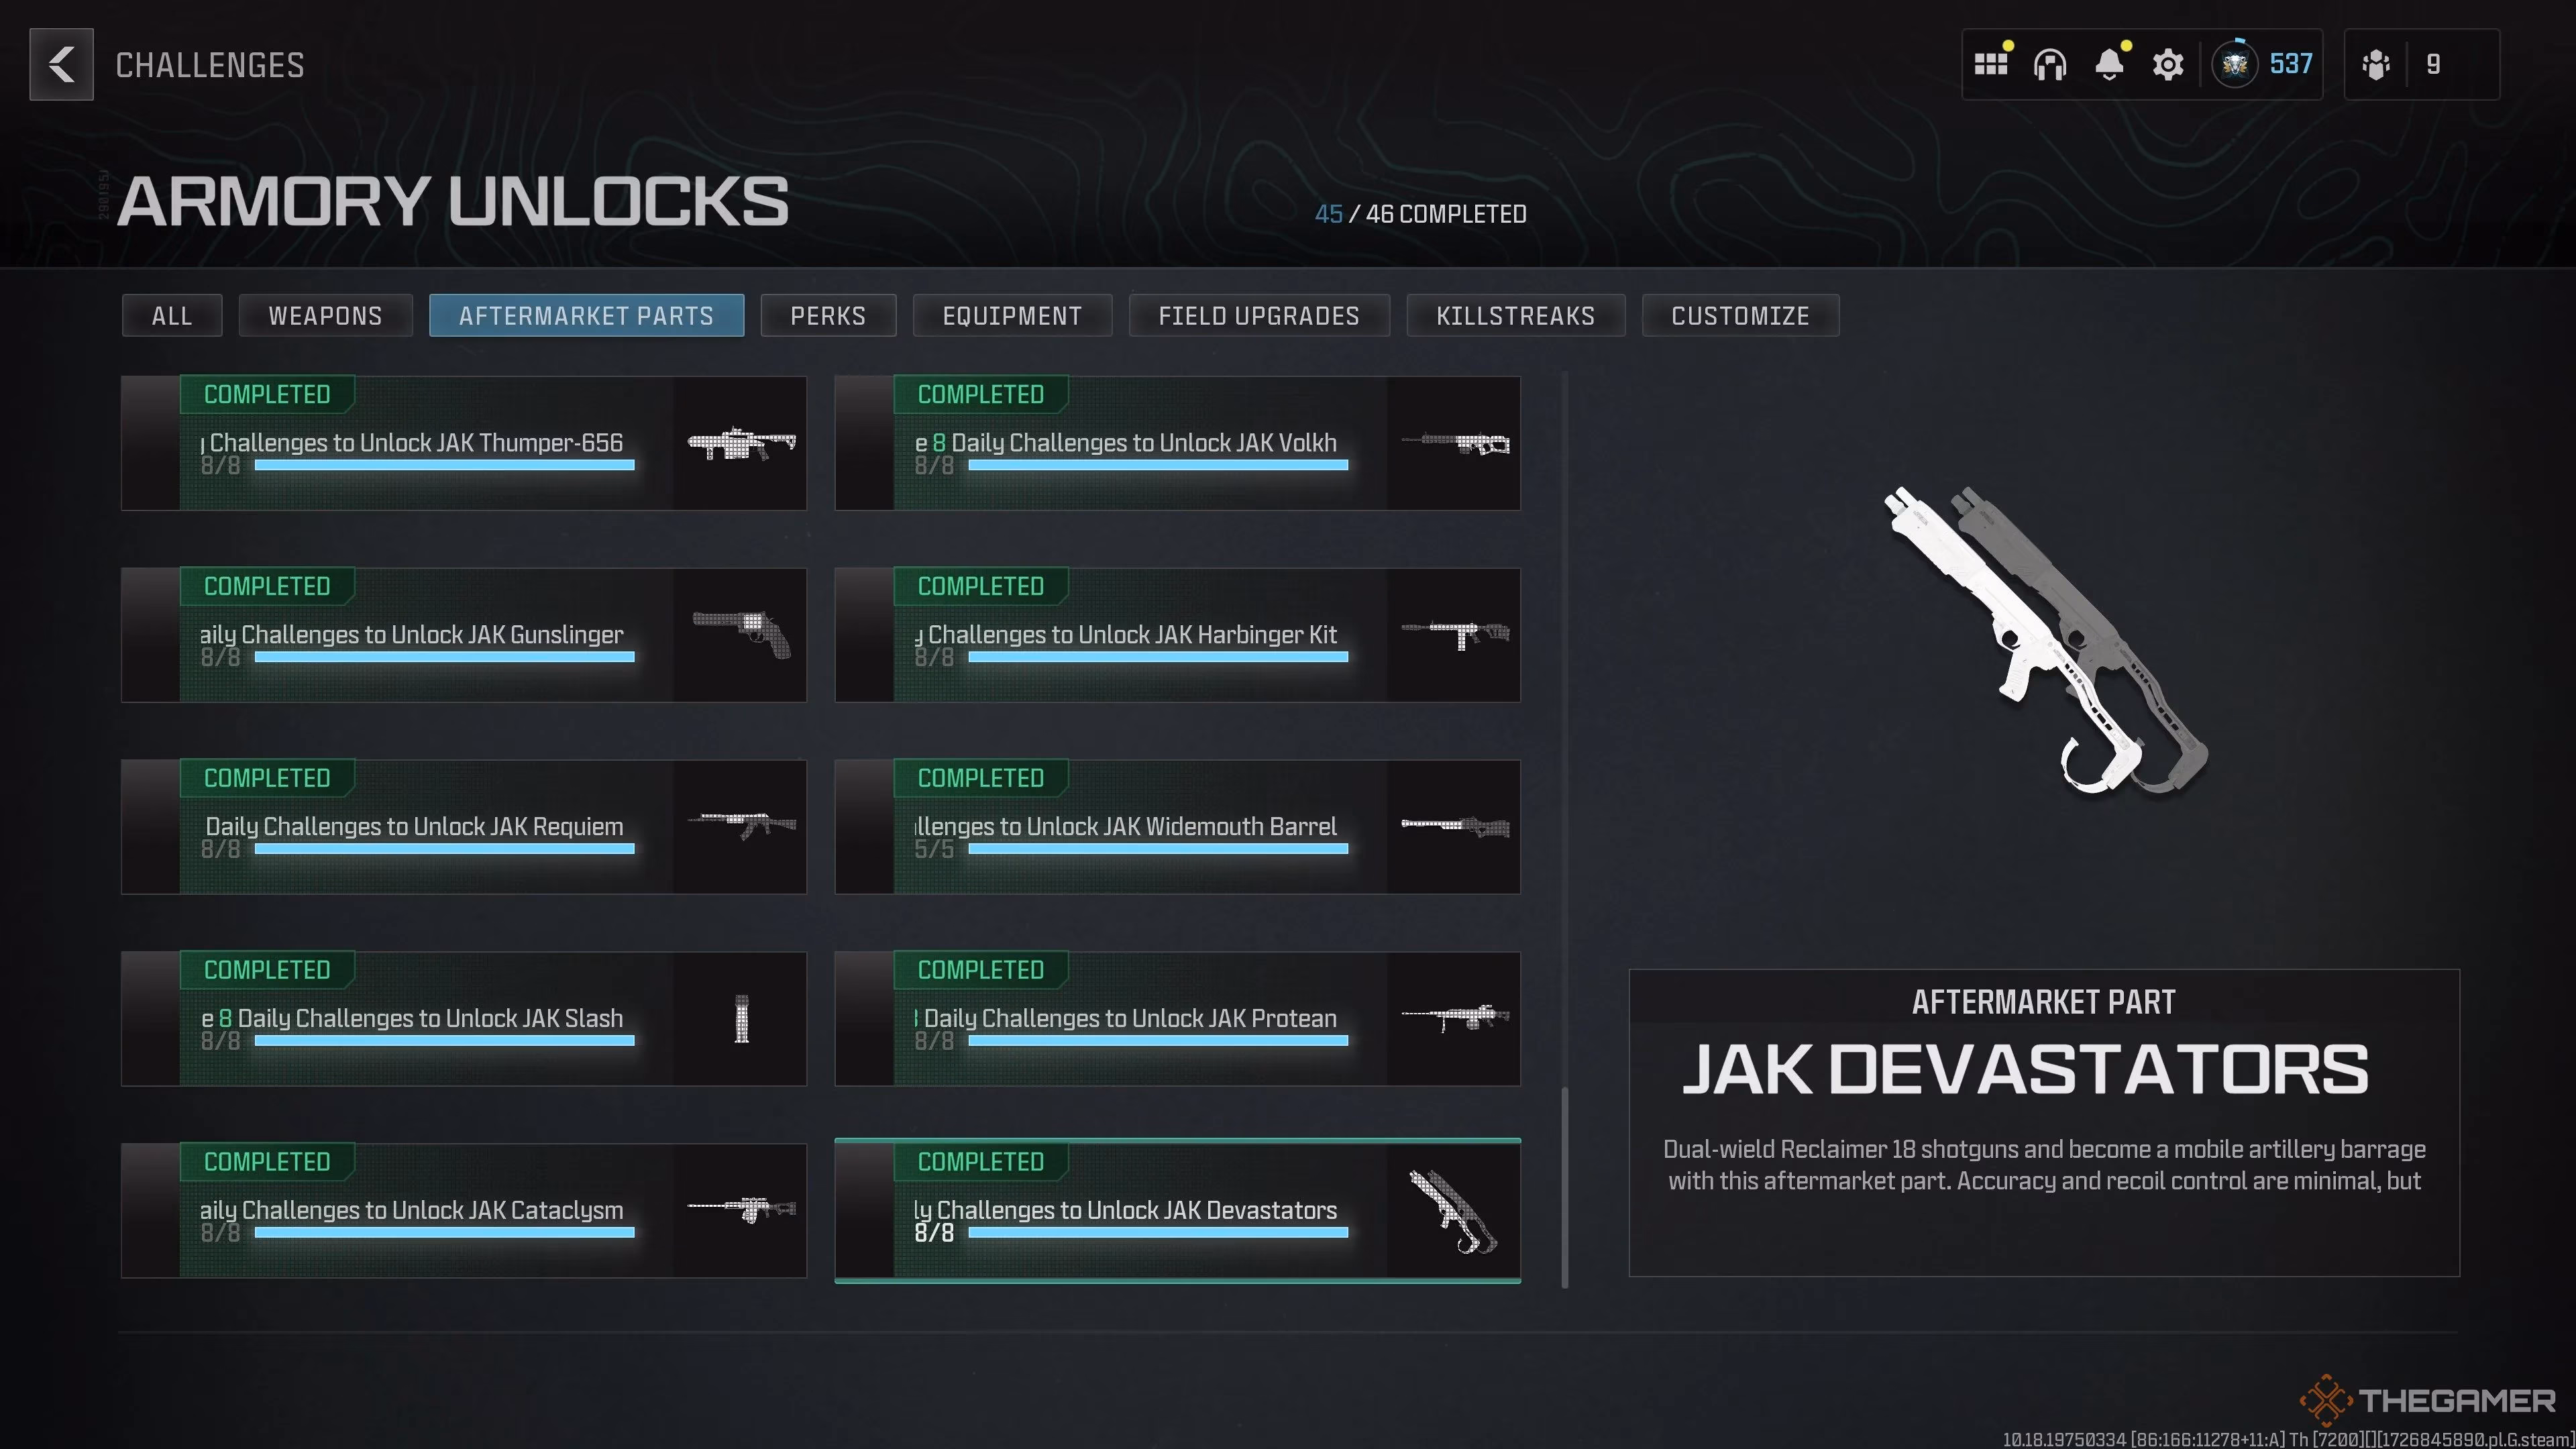
Right now, grabbing the JAK Devastators is all about the Armory Unlocks system. If you missed the boat during the Season 5 weekly challenges (like I almost did!), don't sweat it. Just grind out those Armory objectives. Heads up though: if you did unlock it back then, congrats! You're golden and don't need to jump through hoops again. Once you slap this kit onto your Reclaimer 18, prepare for a whole new world... with some serious trade-offs:
-
Pump-action? Gone! It's dual-wield semi-auto or nothing.
-
Aiming Down Sights (ADS)? Forget about it! You're hip-firing 24/7 with these.
-
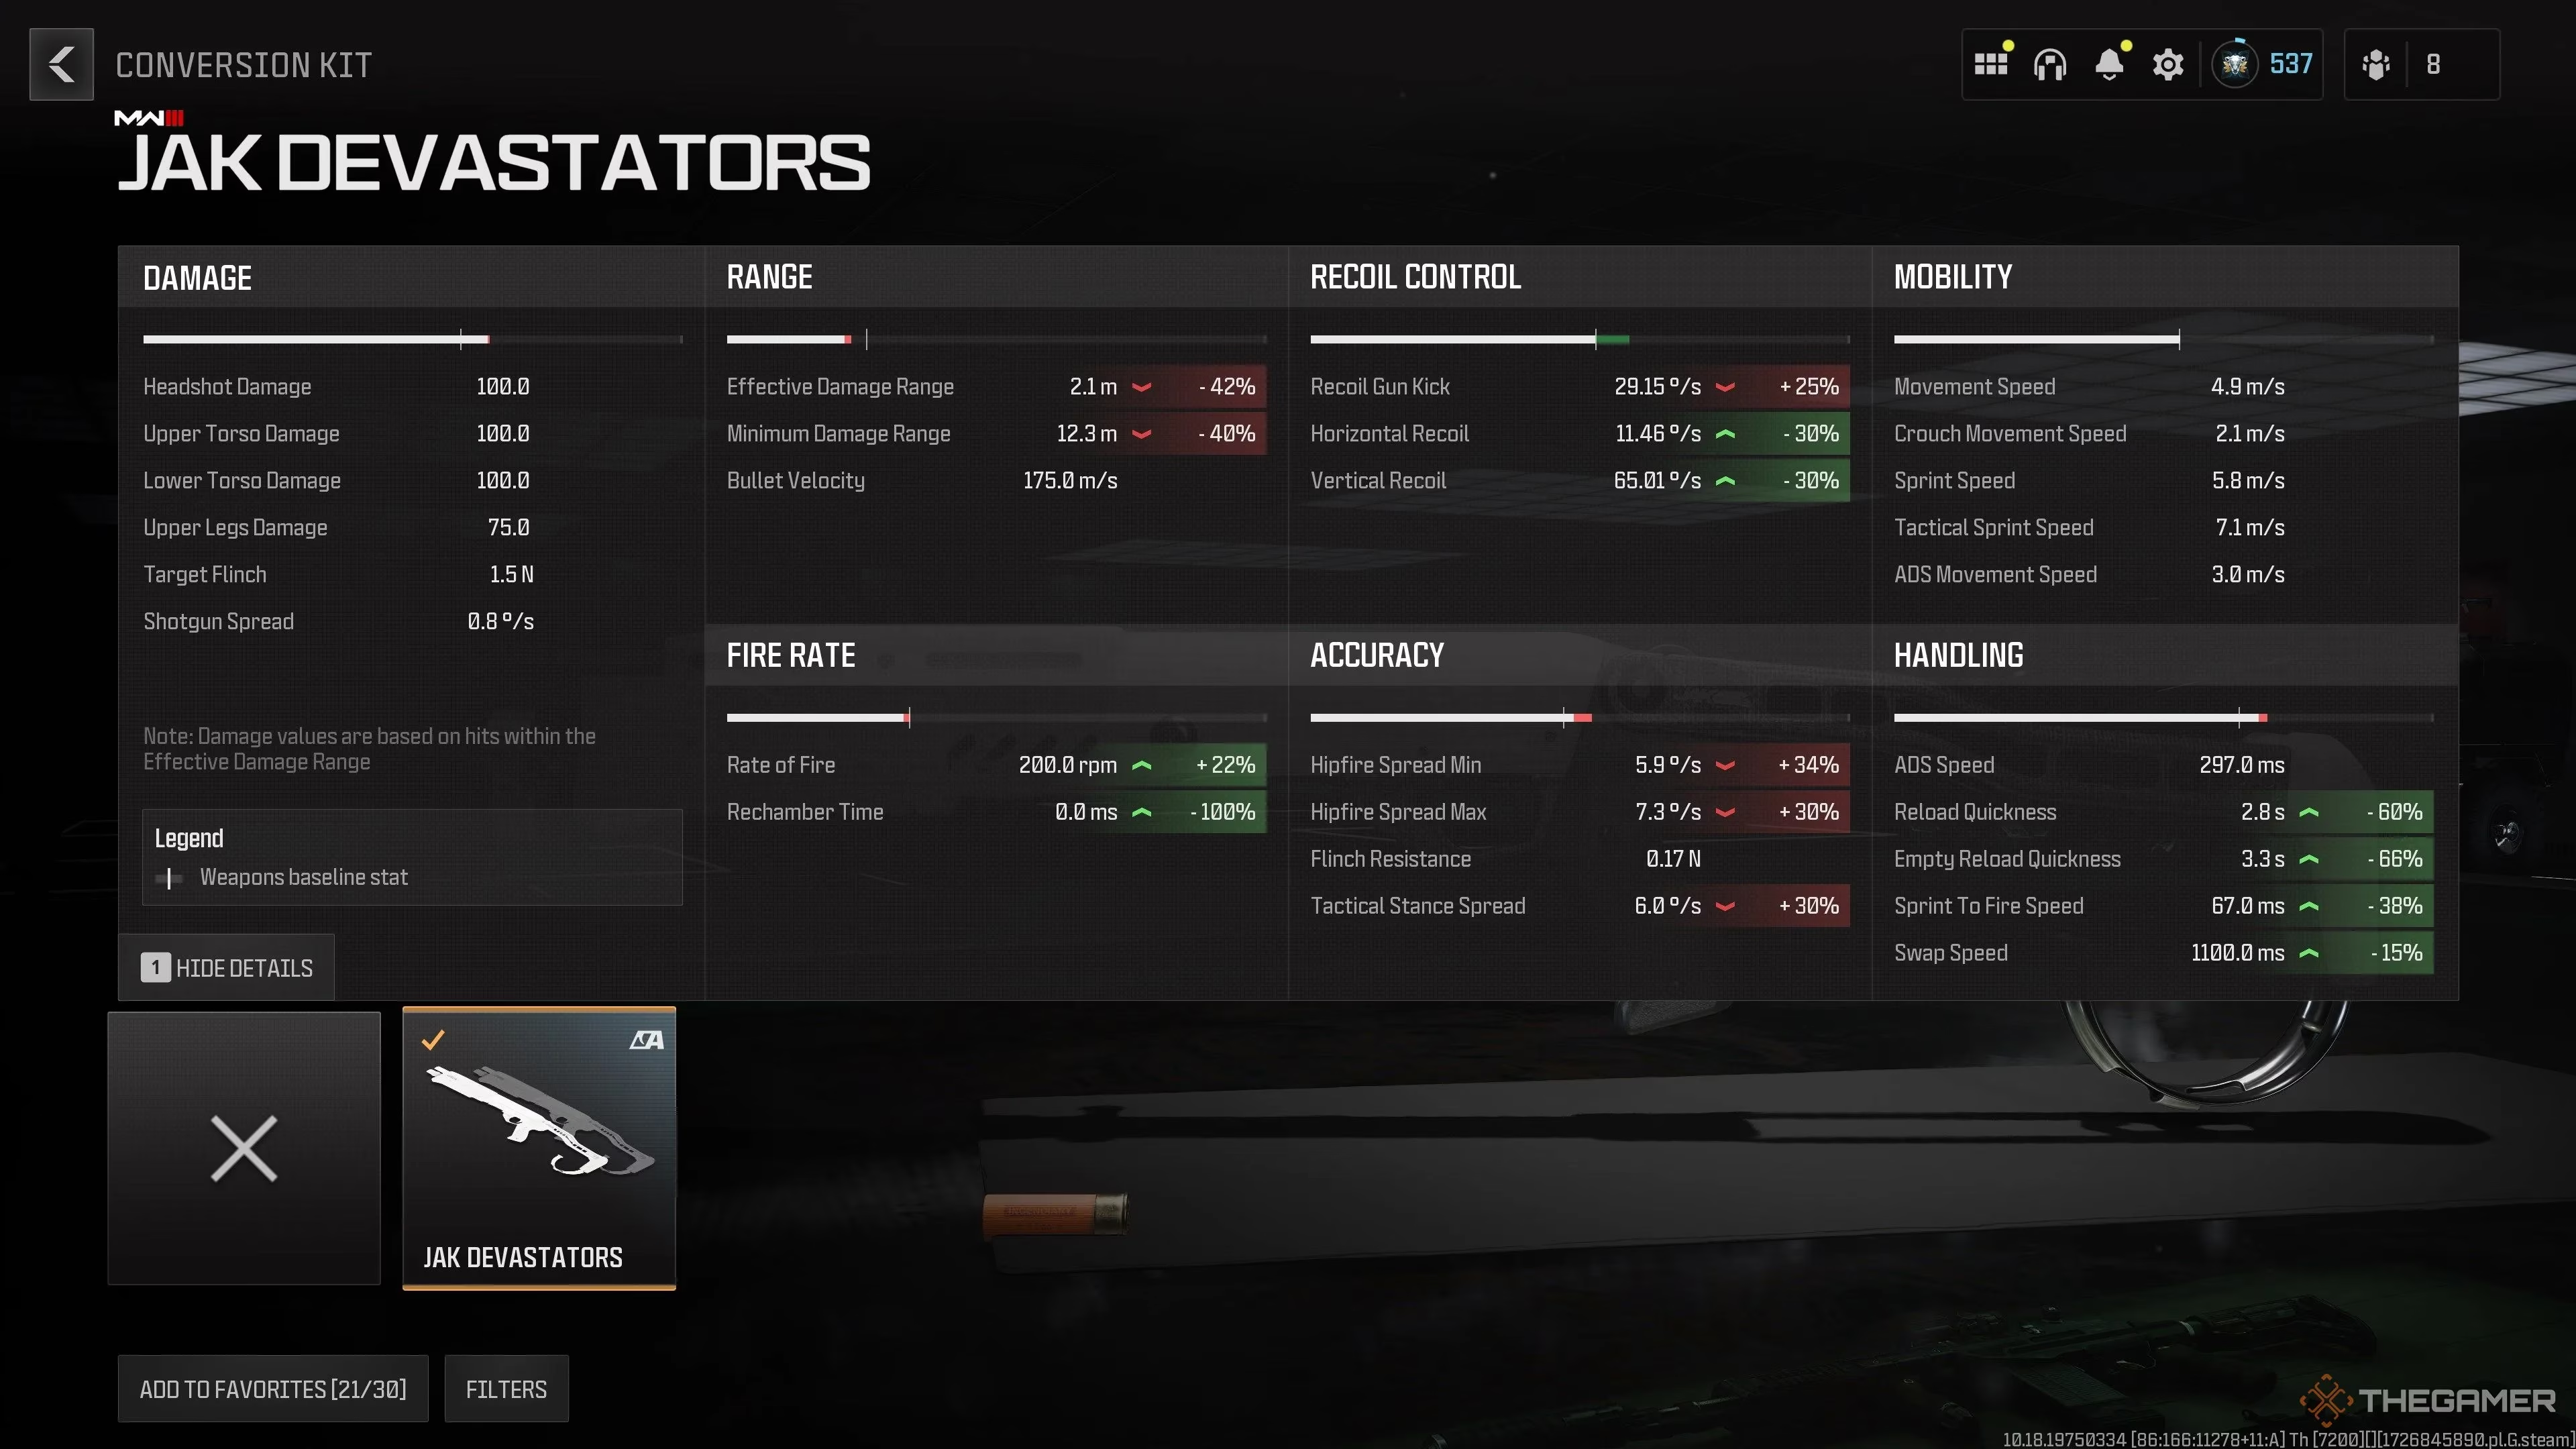
Range? Takes a massive 40% hit. You gotta be in their face.
-
Attachments? Major restrictions – no barrels, stocks, optics, or underbarrels.
-
Ammo Capacity? Drops to a measly 4 shells per gun. Make 'em count!
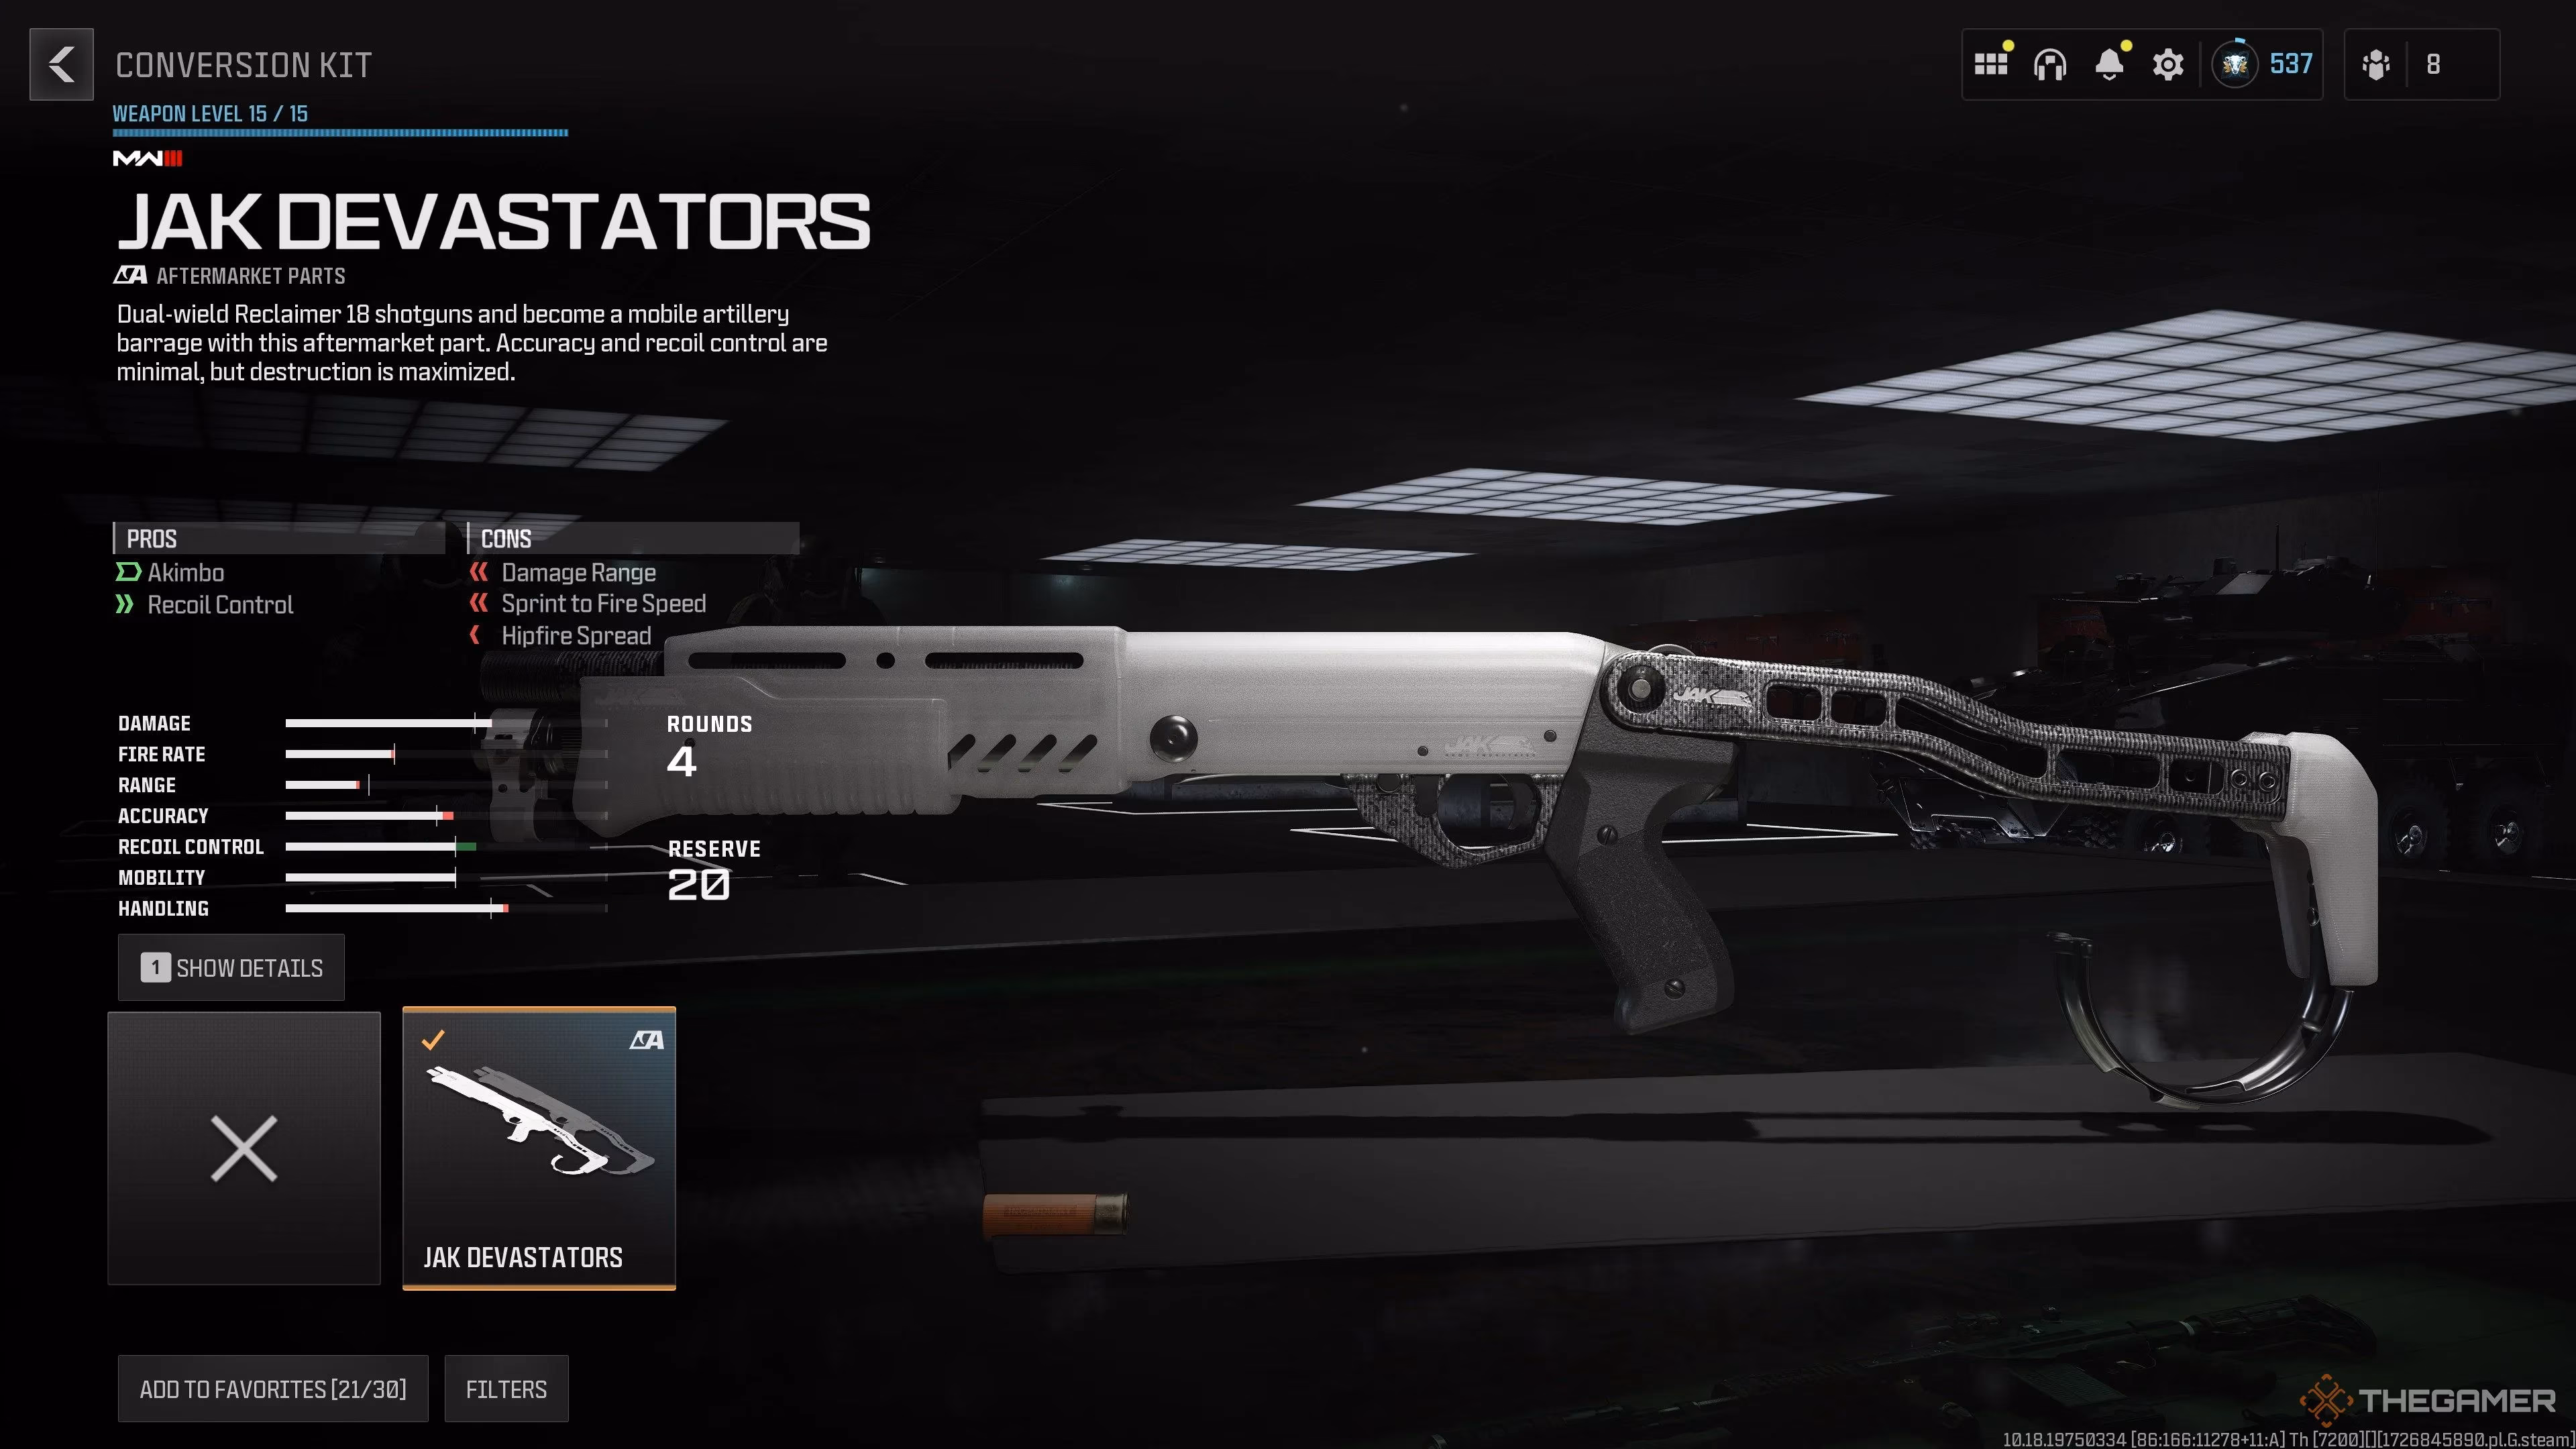
So yeah, it's got drawbacks for days. But lemme tell ya, the payoff? It's insane. With the right setup (especially Dragon's Breath ammo), this is currently the ONLY shotgun in Warzone capable of a one-hit kill. You gotta be practically hugging them (within 3 meters) and land both shots at once, but when you do? Poof! Enemy deleted. It's also an absolute monster in Hardcore Multiplayer. Pure, devastating power up close – it lives up to its name!
🔧 Crafting the Perfect Beast: My Ultimate JAK Devastators Build
Okay, let's get down to brass tacks. Building for the JAK Devastators is tricky 'cause it locks down so many slots. You gotta play the hand you're dealt, focusing on enhancing its brutal hipfire strength and mitigating its weaknesses. Here's the loadout I've been running with killer success across both MP and Warzone:
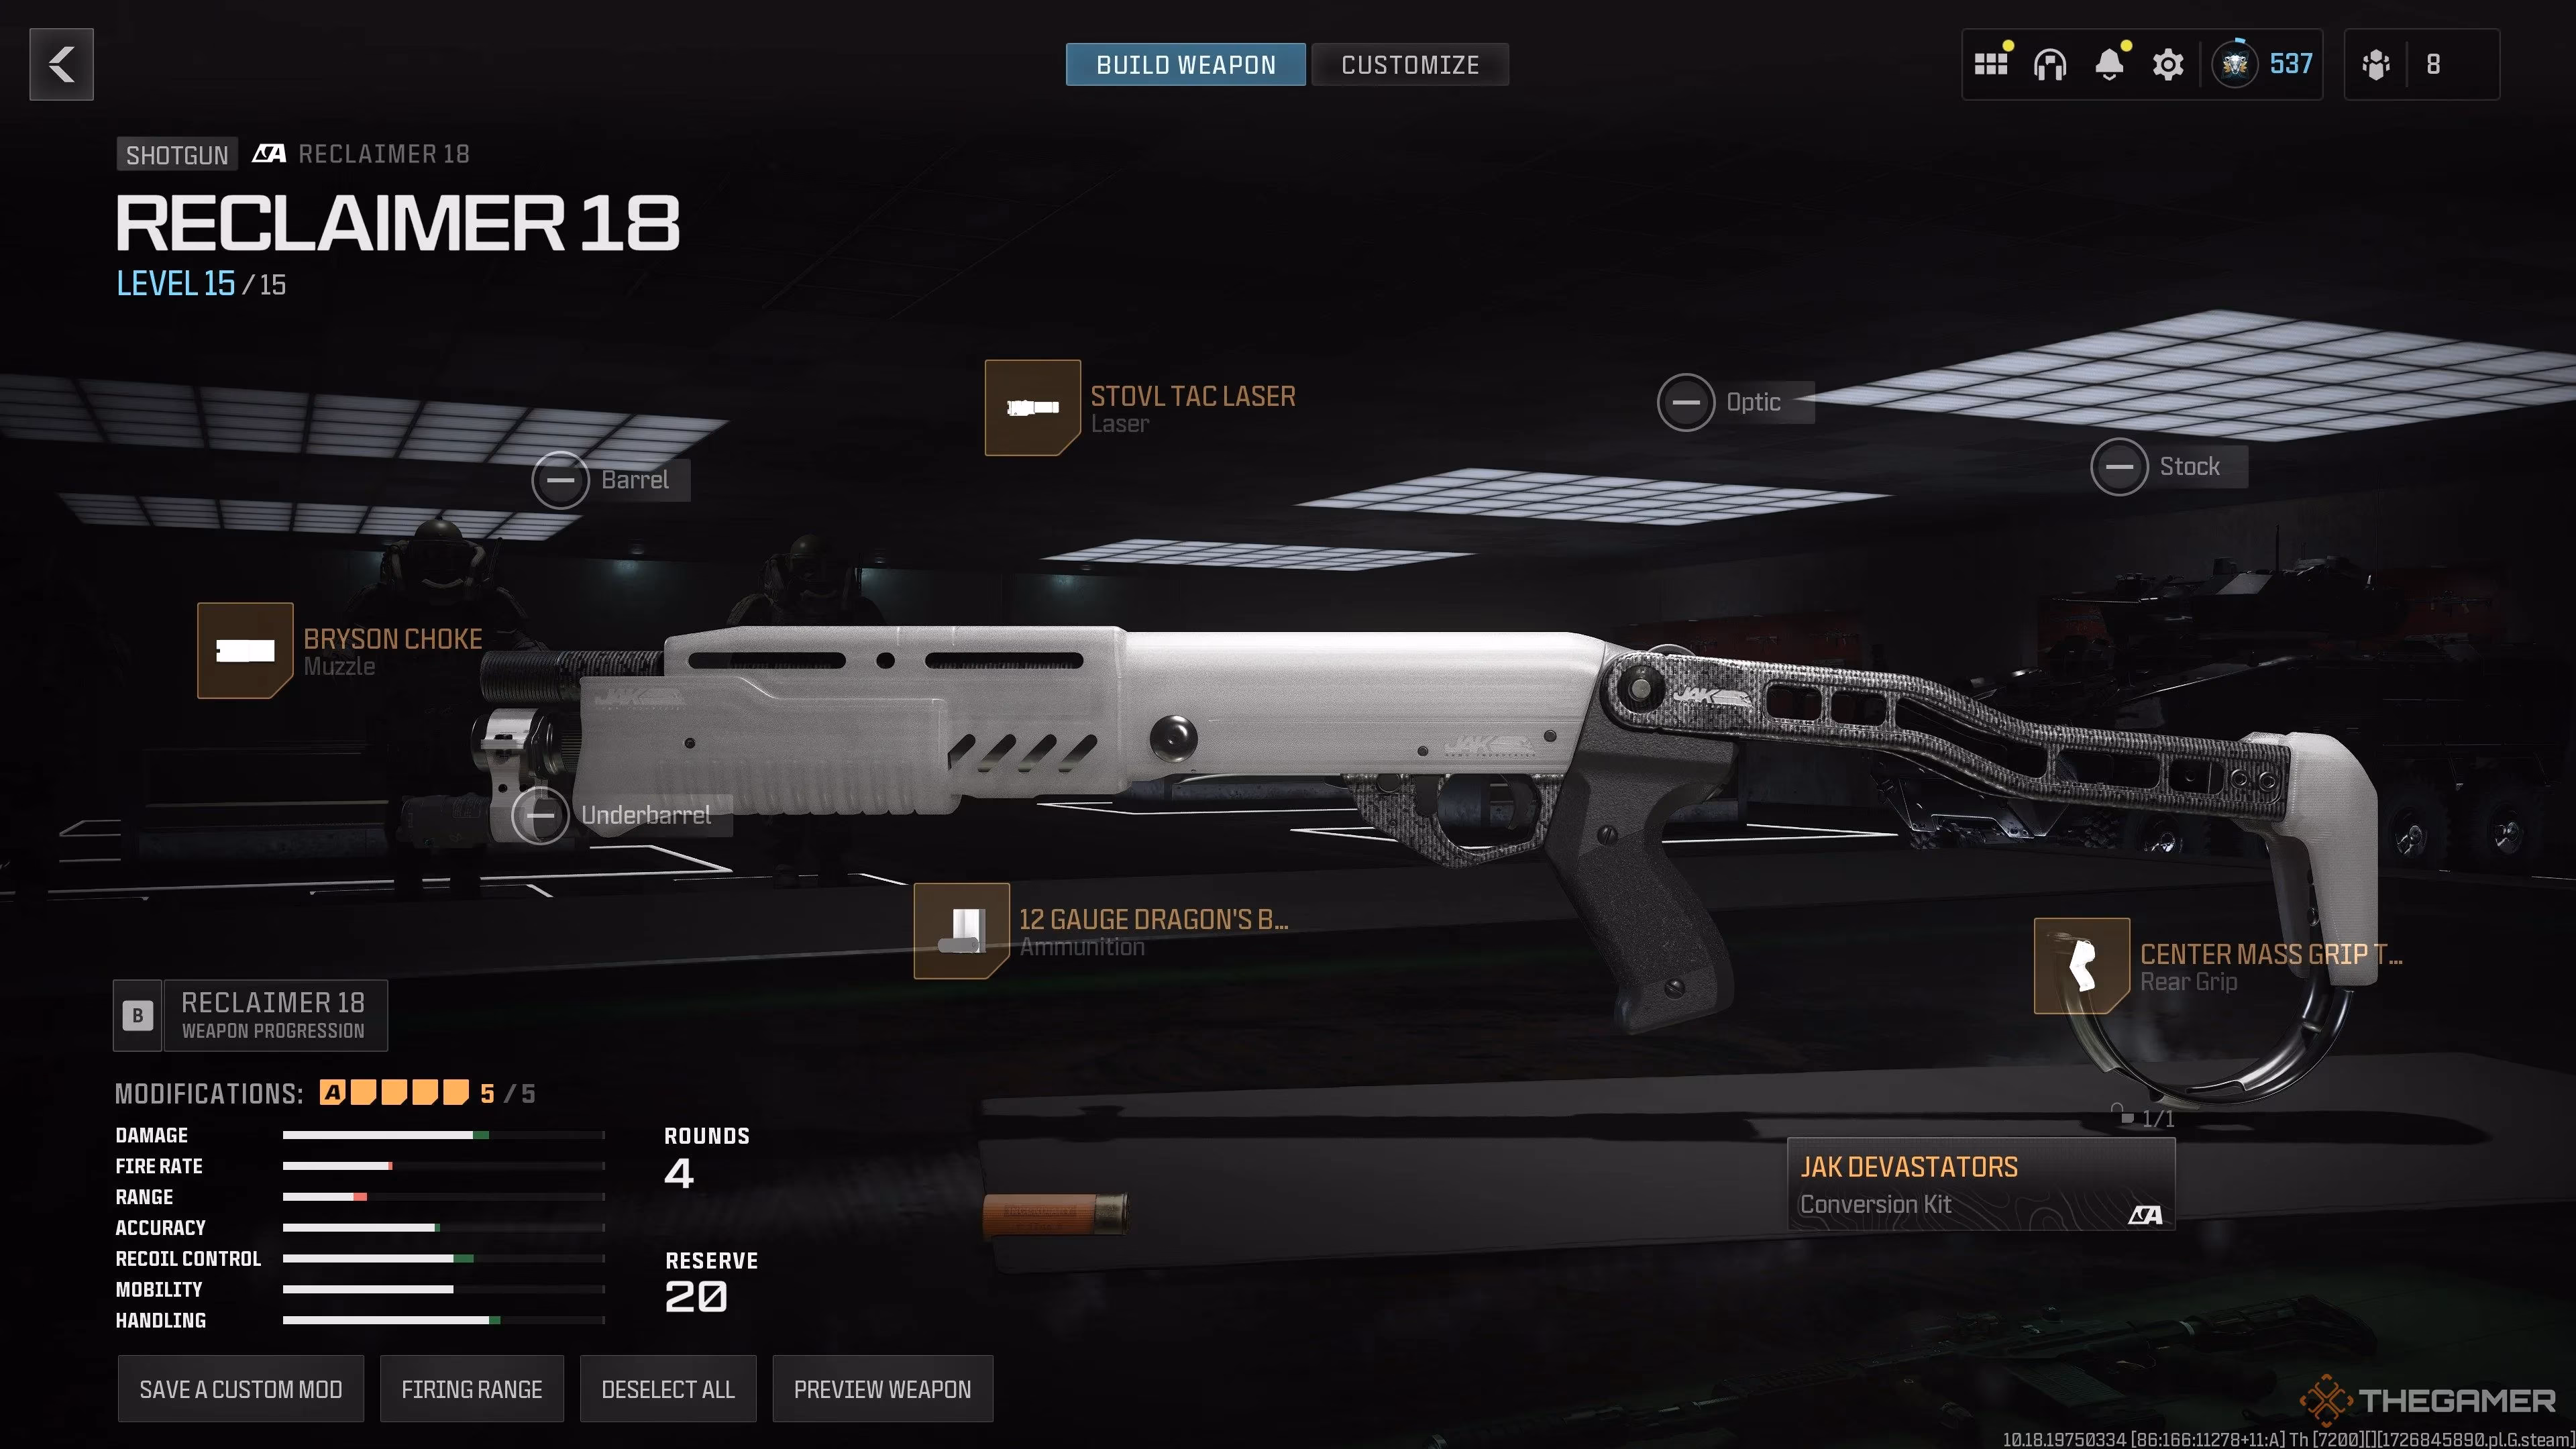
| Attachment Slot | My Choice | Key Pros | Key Cons |
|---|---|---|---|
| Conversion Kit | JAK Devastators | Akimbo, +Recoil Control (Unlisted: Disables Pump Action) | -40% Damage Range, -Sprint to Fire Speed, -Hipfire Spread |
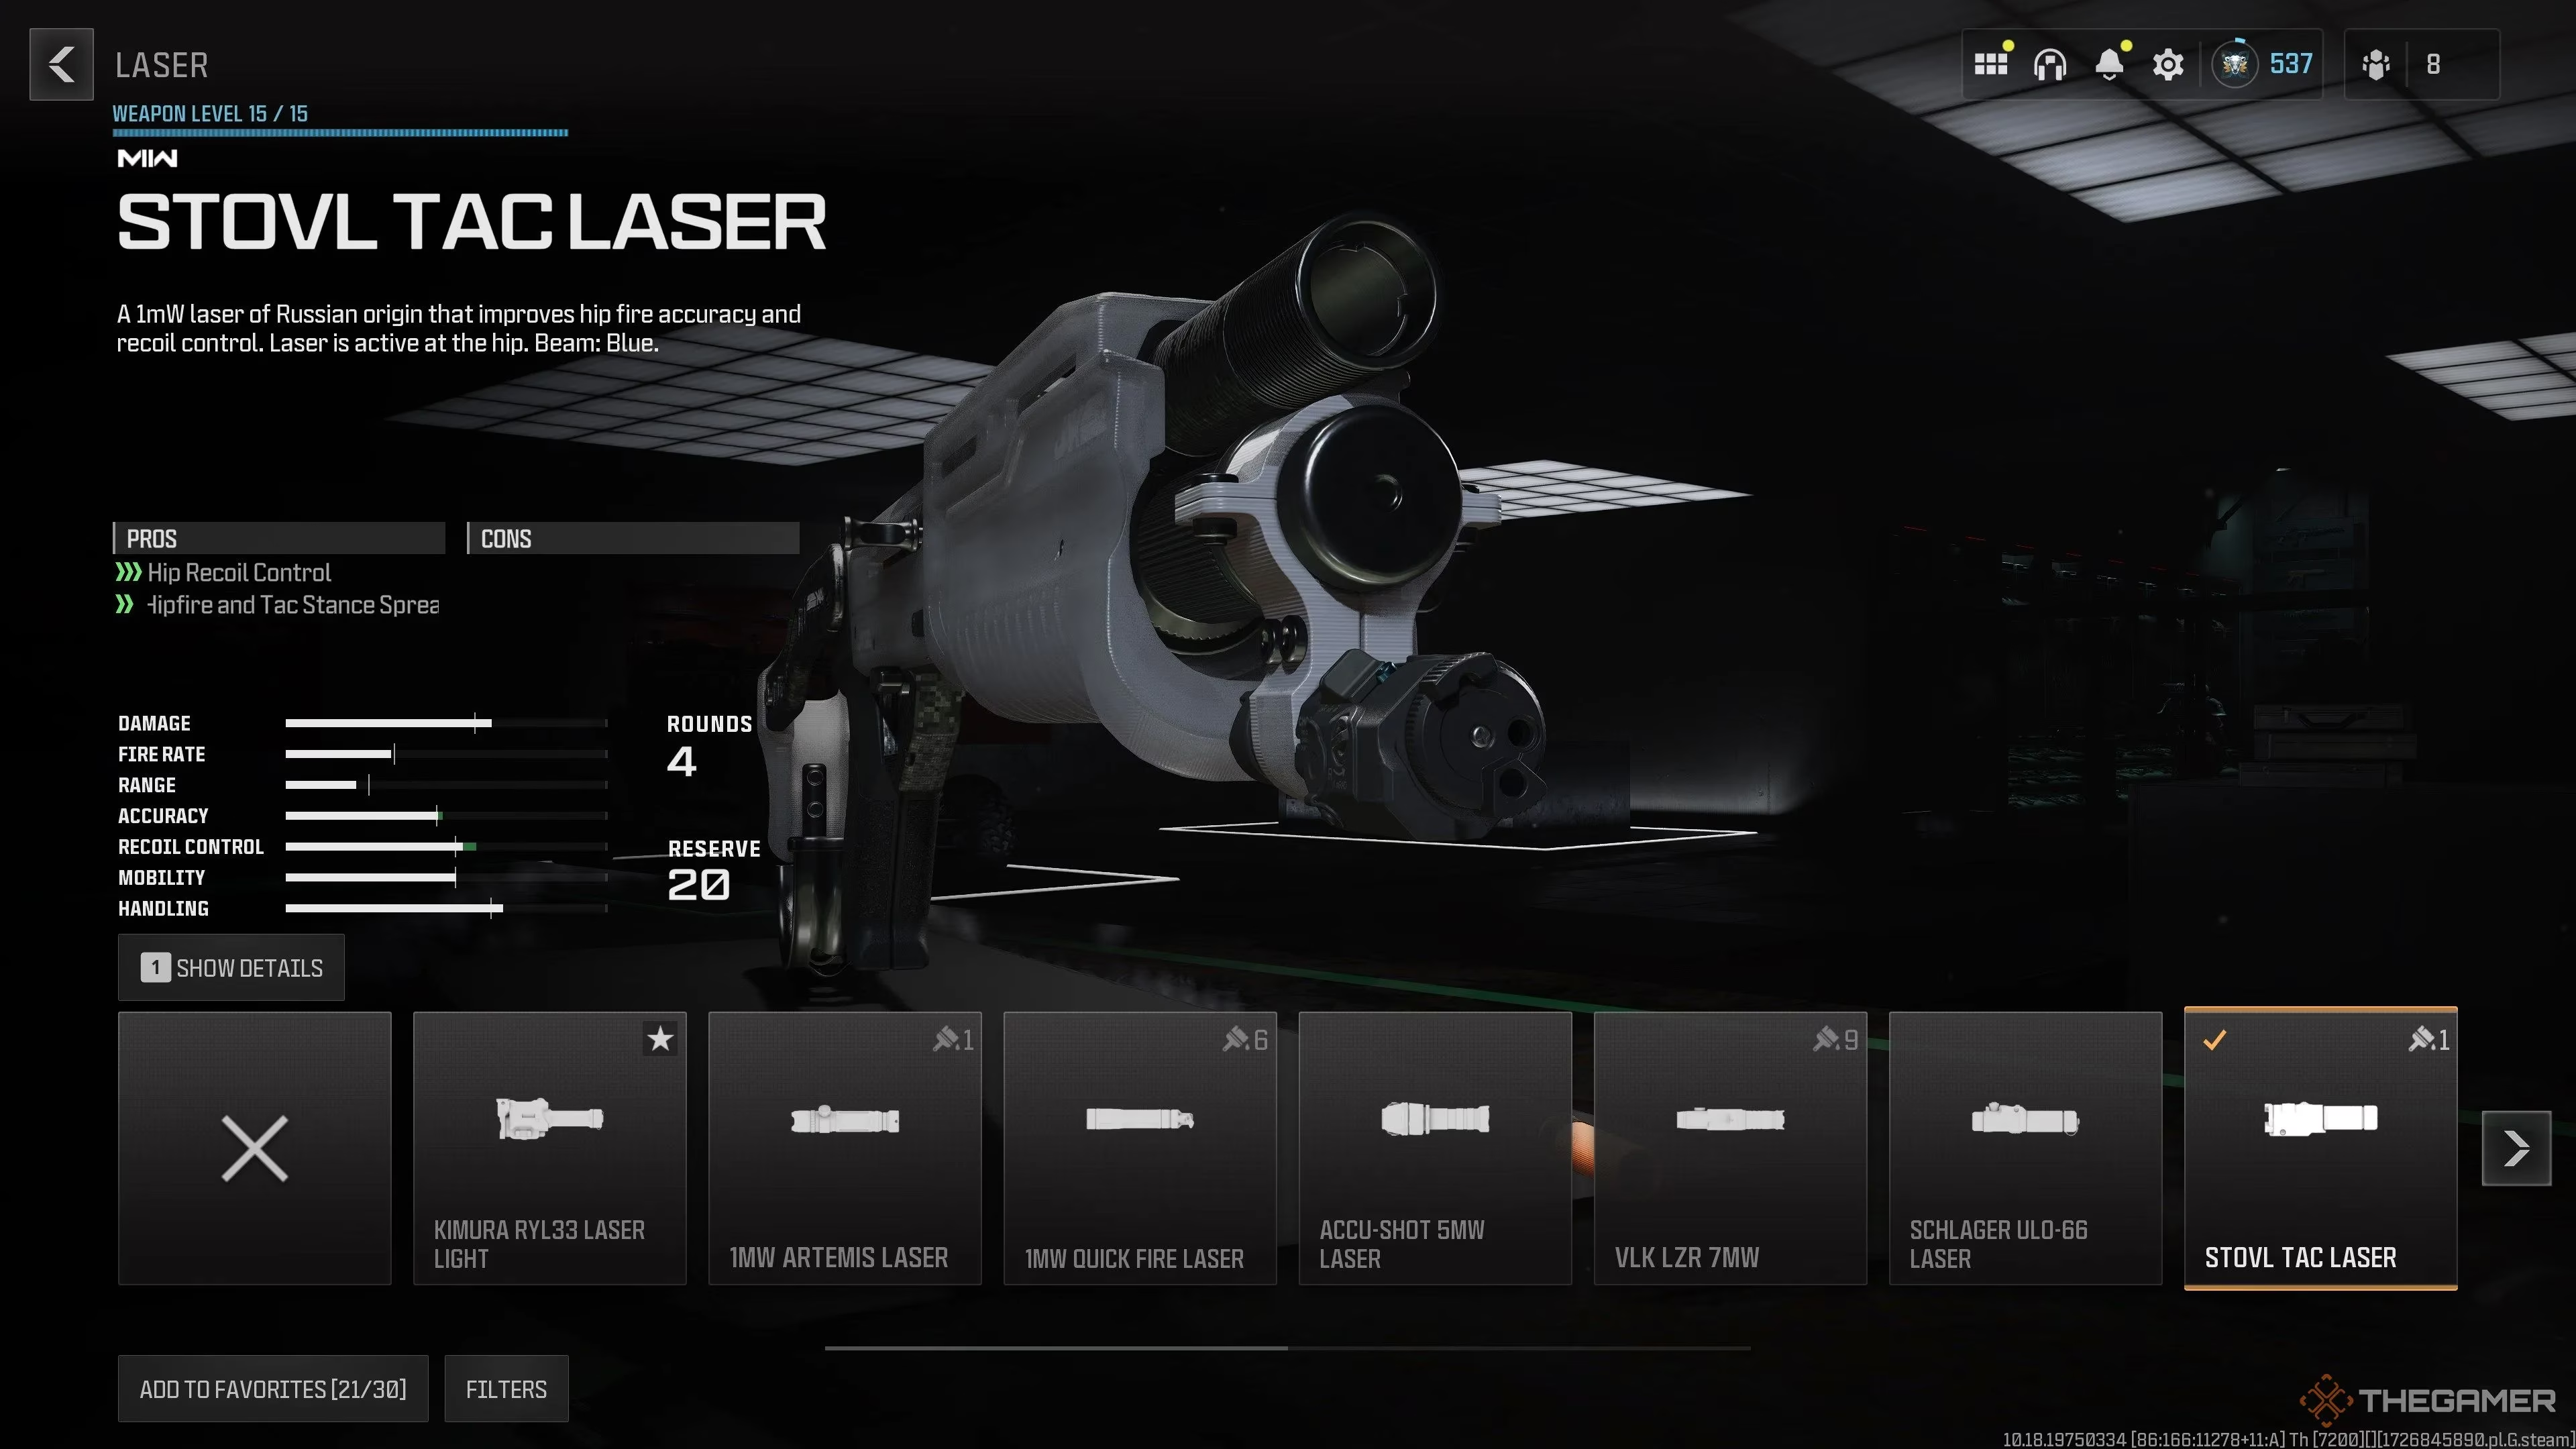
| Laser | Stovl Tac Laser | +Hip Recoil Control, +Hipfire & Tac Stance Spread (Tighter Shot Group) | Visible to enemies |
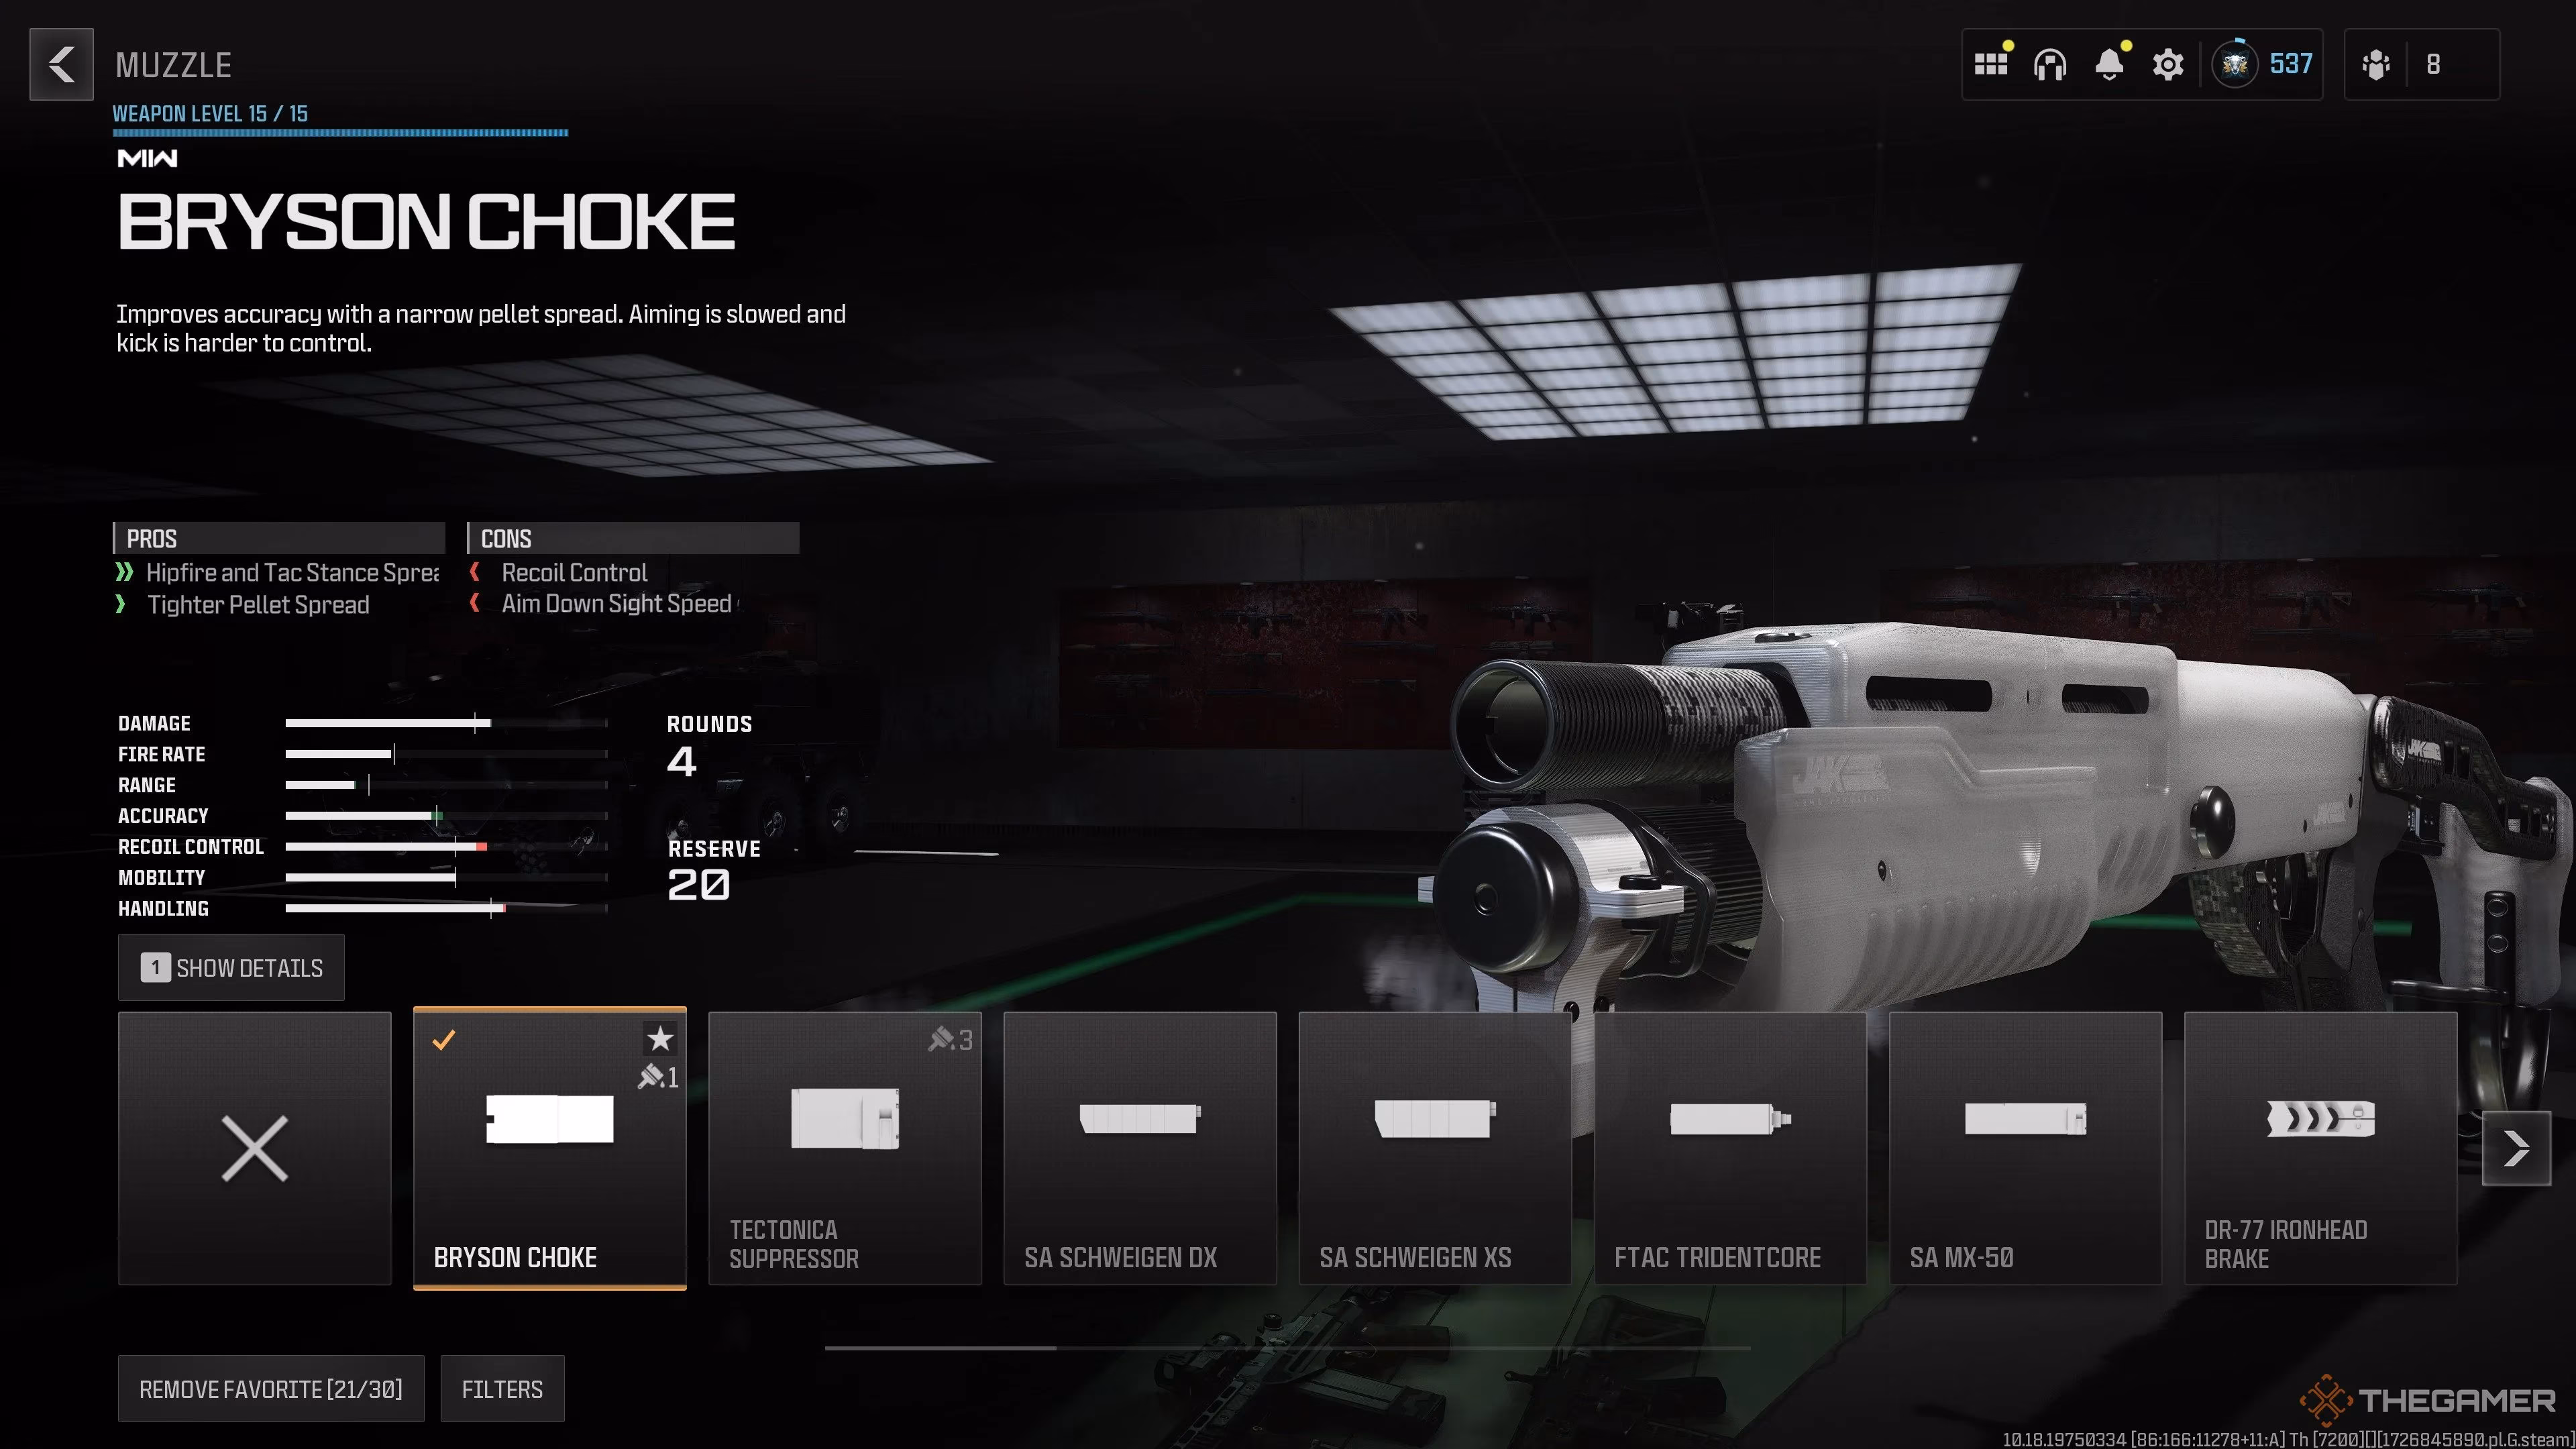
| Underbarrel | Bryson Choke | +Hipfire & Tac Stance Spread, Tighter Pellet Spread | -Recoil Control, -Aim Down Sights Speed (But ADS is disabled anyway!) |
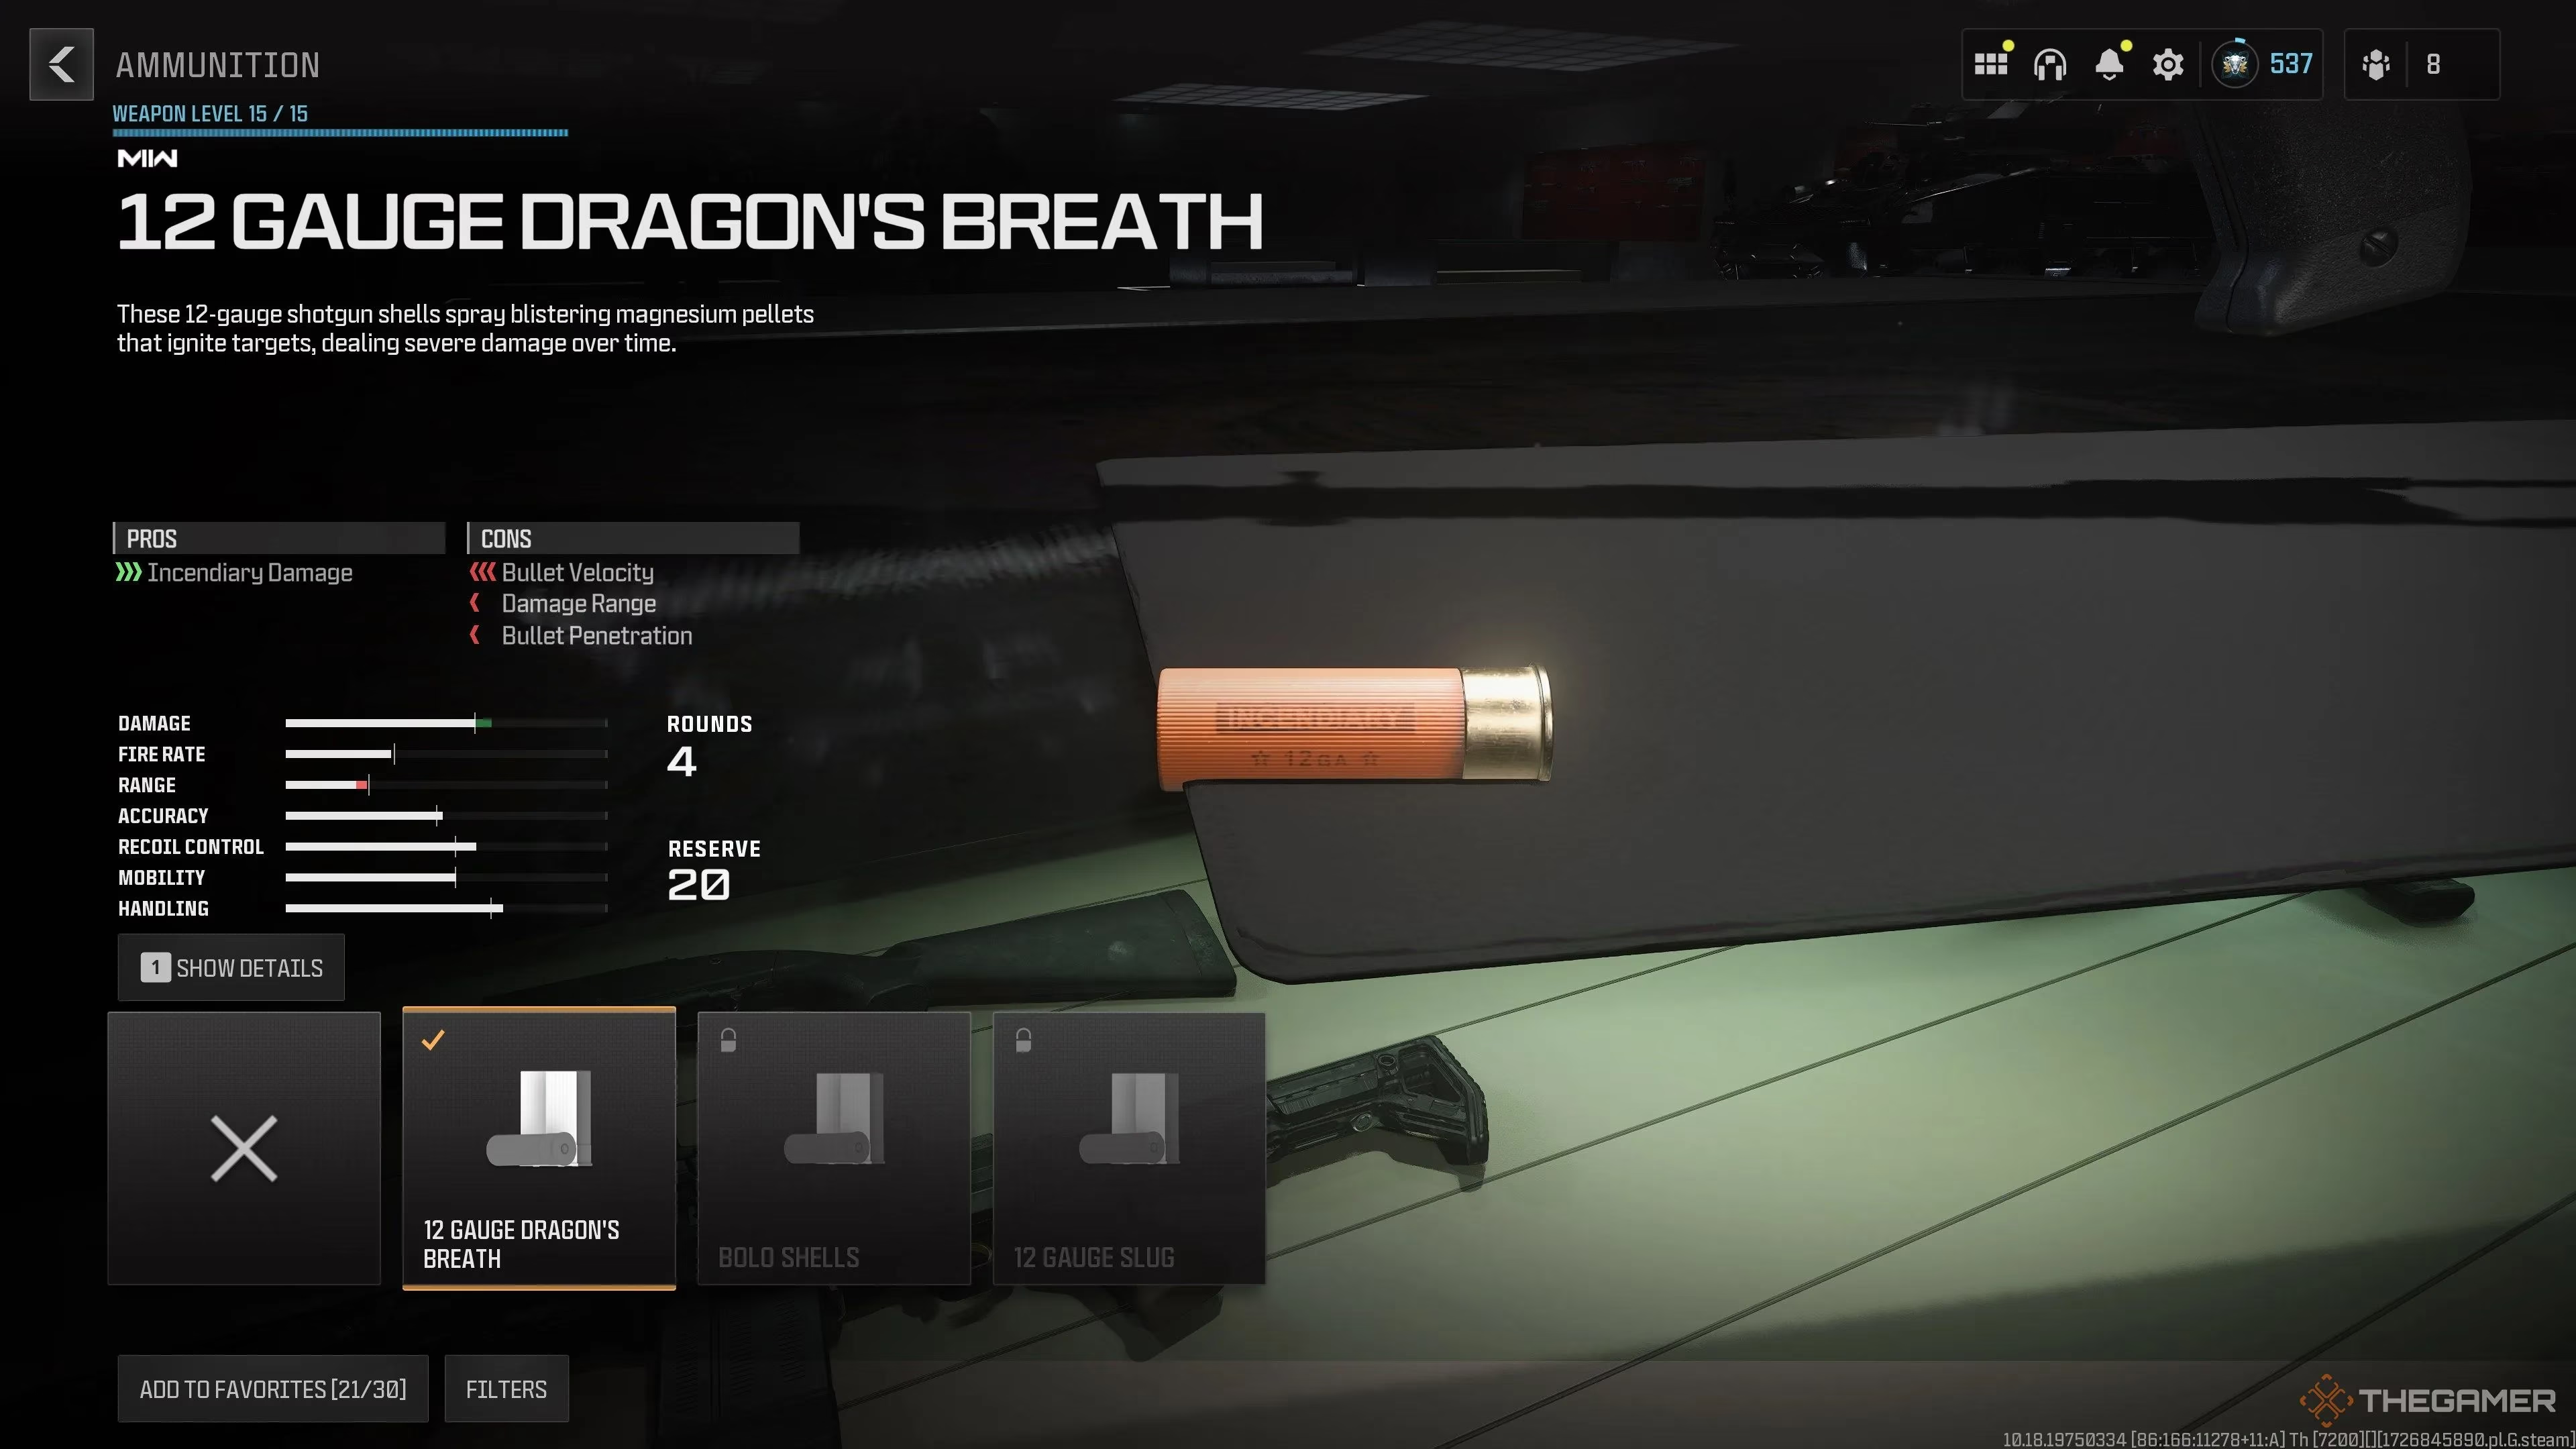
| Ammunition | 12 Gauge Dragon's Breath | 🔥 Sets targets on fire! Key for One-Hit Kills in Warzone | -Bullet Velocity, -Damage Range, -Bullet Penetration |
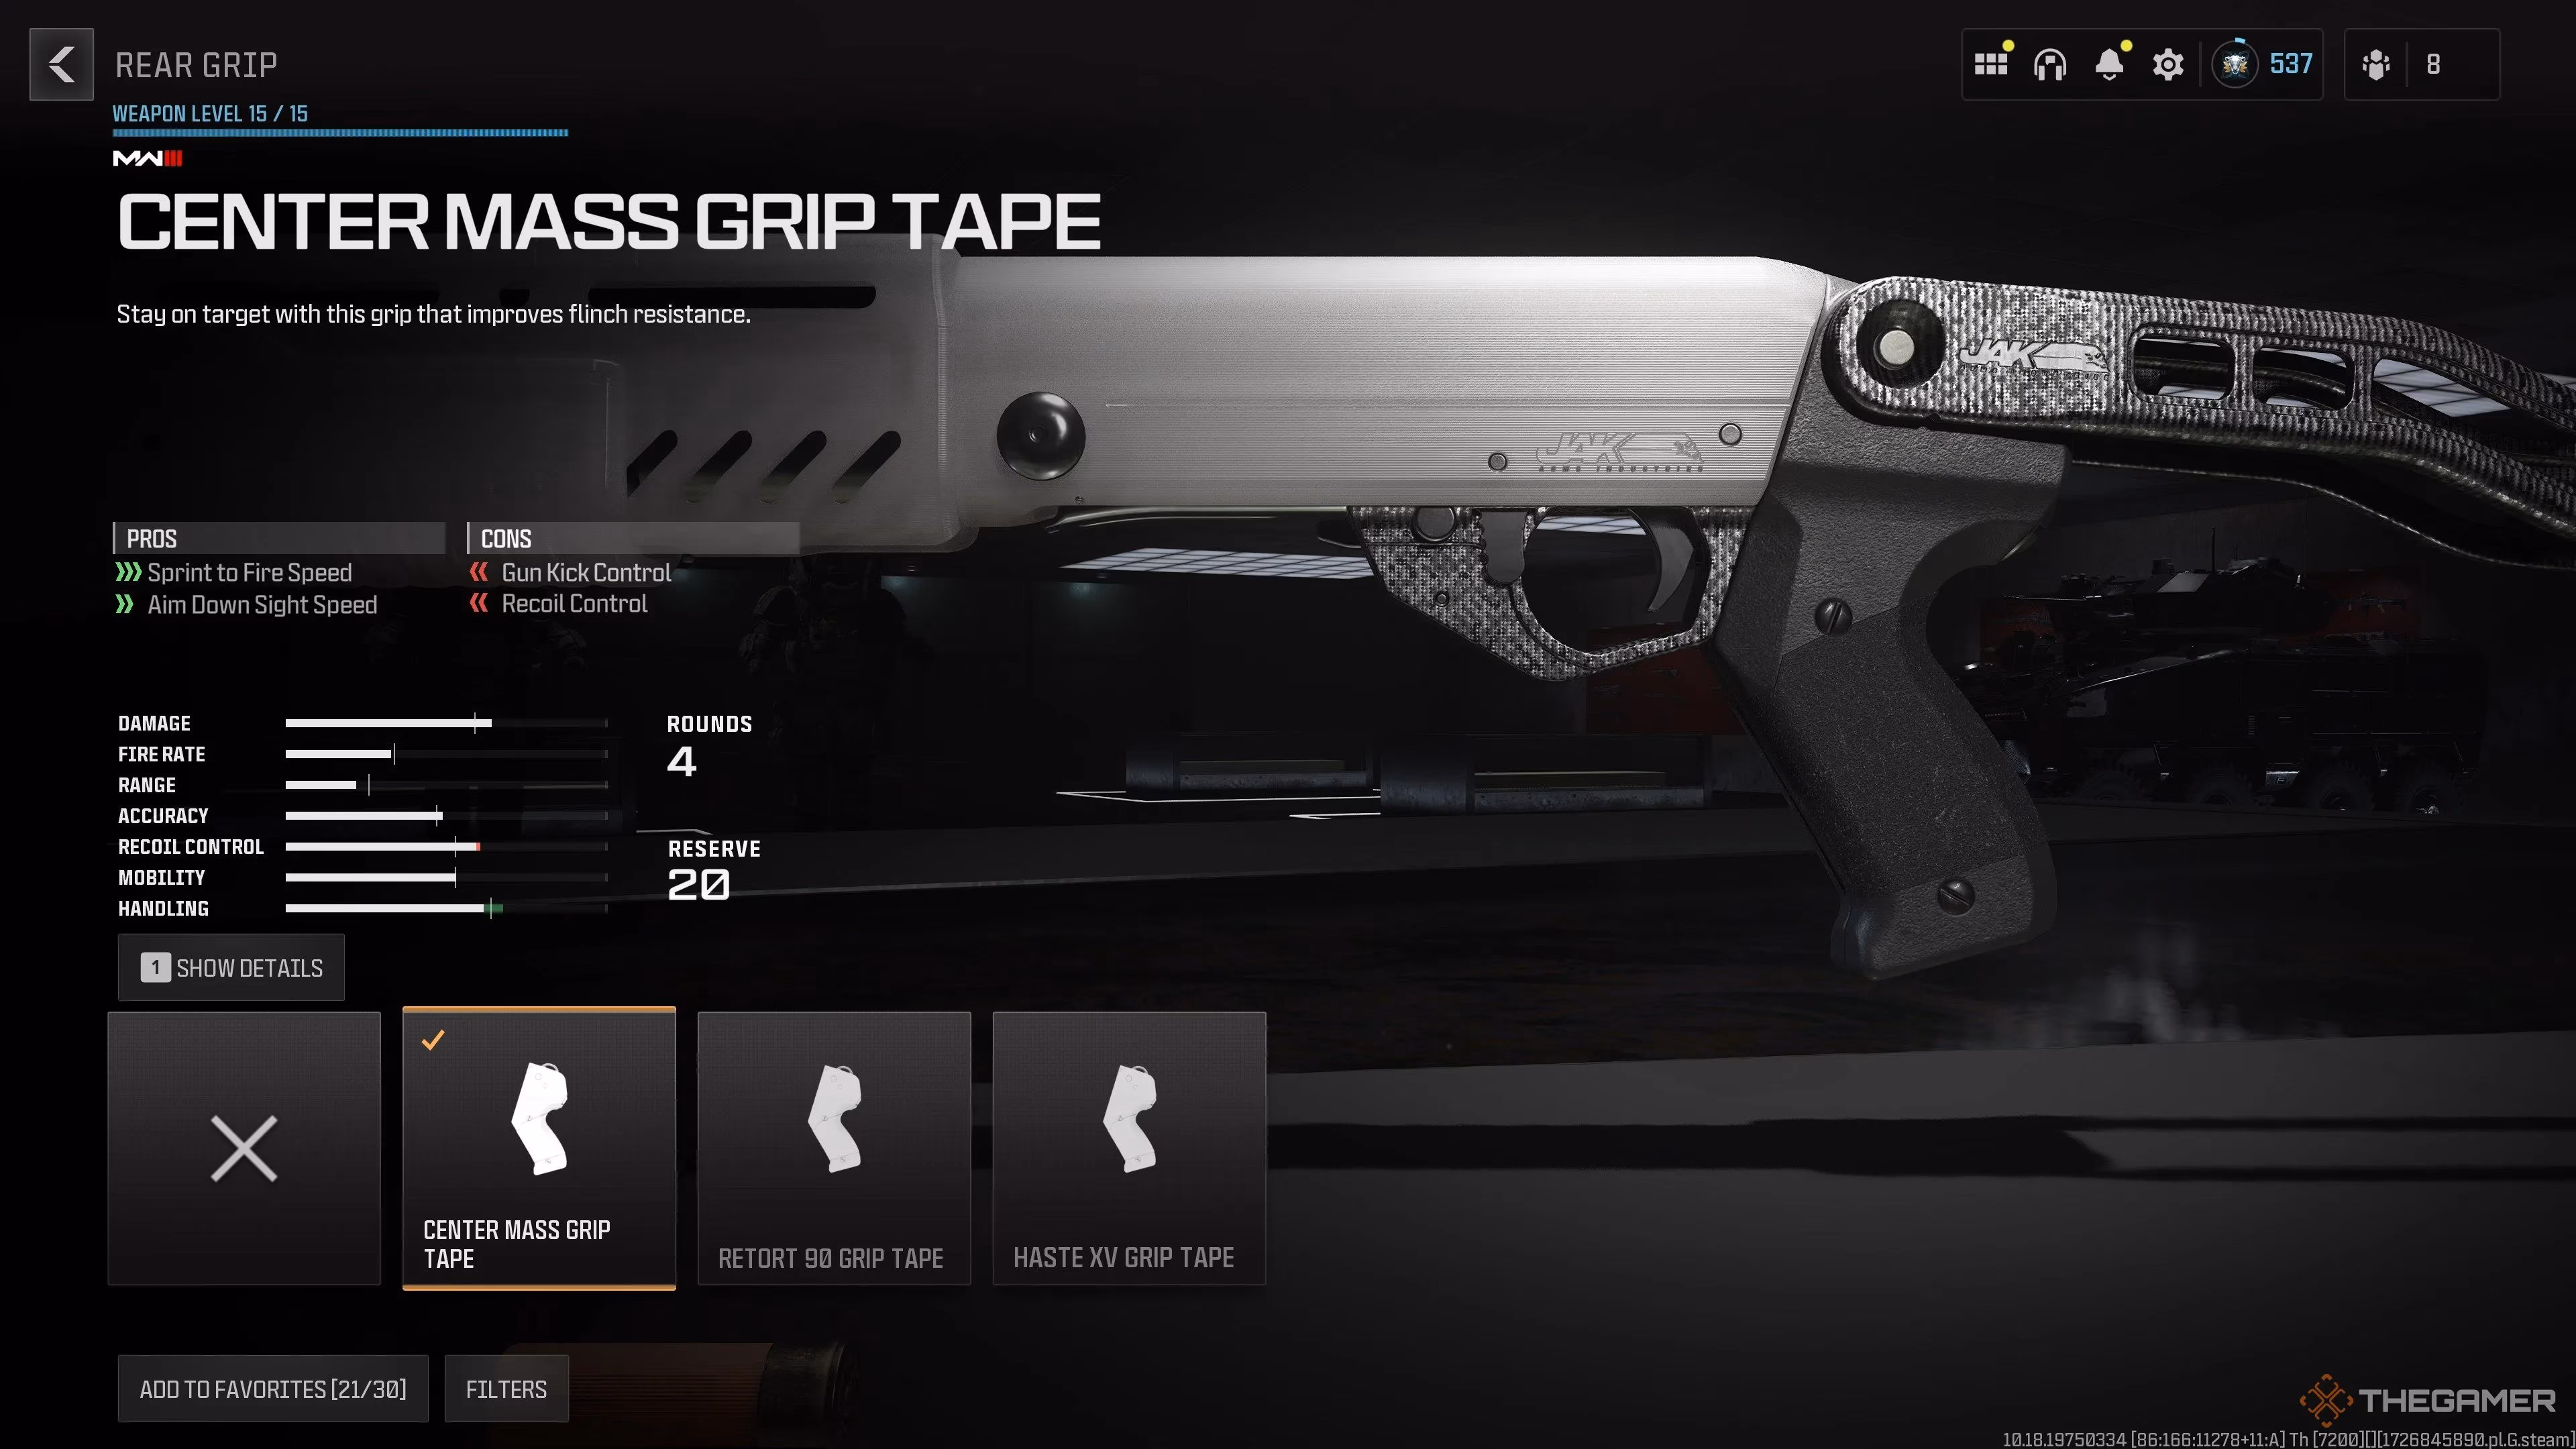
| Rear Grip | Center Mass Grip Tape | +Sprint to Fire Speed, +Aim Down Sights Speed | -Gun Kick Control, -Recoil Control |
Why This Build Slaps:
-
Double Trouble: The JAK Devastators themselves are the core. Akimbo shotguns firing semi-auto? Yes please!
-
Tighten Up: The Bryson Choke and Stovl Tac Laser work hand-in-hand to make your hipfire spread much tighter and more controllable. This is CRUCIAL since you can't ADS. Every pellet counts!
-
Burn Baby Burn: 12 Gauge Dragon's Breath 💥 is the secret sauce. The instant burn damage is what enables those glorious one-hit kills in Warzone (within 3m, hitting both shots). Even if it doesn't kill instantly, the DoT (Damage over Time) often finishes them off. Pro Tip: Watch out for players using EOD – it counters the burn effect hard.
-
Get Shooting Faster: The Center Mass Grip Tape is essential to counter the kit's inherent Sprint-to-Fire penalty. Getting those first shots off milliseconds faster is often the difference between winning and respawning.
⚡ Gearing Up for Maximum Mayhem: Perks & Equipment
Running this build is all about aggression and speed. You're a close-quarters tornado! Here's the perk and gear setup I swear by:
Perks:
-
Vest: Infantry Vest (Gives you Running Sneakers for free! Gotta go fast!)
-
Gloves: Commando Gloves (Removes mid-air accuracy penalty – great for jump shots around corners)
-
Boots: Lightweight Boots (MORE movement speed! Stack that sprint!)
-
Gear:
-
Compression Plate (Restores HP on kills – essential for surviving multi-kill engagements)
-
Tac Mask (Counters flashes/stuns) OR Mag Holster (Faster reloads – helpful with the small mags)
-
Equipment:
-
Secondary: Your choice! (I often run a fast SMG or a long-range AR for versatility)
-
Lethal: Your choice! (Semtex or Throwing Knife for quick finishes)
-
Tactical: Stim (Quick health regen is vital when you're constantly in the thick of it)
-
Field Upgrade: Med Box (Great for team support or sustaining yourself during longer holds)
Playstyle Tips:
-
Embrace the Hipfire: You cannot ADS. Get comfortable with the hipfire reticle and trust the Bryson Choke/Laser combo.
-
Master the Range: 3 meters is your golden zone for one-hit kills in Warzone. Any further, and you'll need both shots plus the burn. In MP, the lethal range is a bit more forgiving but still very close.
-
Flank Hard, Move Fast: Use your speed perks to get into unexpected positions. Catch enemies off guard where your devastating CQC power shines.
-
Reload Discipline: 4 shells go fast! Reload constantly during any downtime. Mag Holster helps here.
-
Don't Challenge Mid/Long: Seriously, just don't. Disengage and reposition if you're caught out. You'll get shredded.
💥 Final Thoughts: Pure, Unfiltered Devastation
Look, the JAK Devastators kit isn't subtle. It's not versatile. It demands a specific, aggressive playstyle and punishes mistakes harshly. But man, oh man, when it clicks? When you round a corner, unleash both barrels, and watch two enemies instantly turn into flaming death icons? There's nothing quite like it in MW3 right now. That Season 6 stealth buff turned this from a niche toy into a legitimate close-range terror. Unlocking it via Armory might take some effort, and mastering the build and playstyle has a learning curve, but the payoff is absolutely worth it. If you love getting up close and personal and making enemies disappear in a blaze of glory, this build is your holy grail. Get out there and devastate! 🔥💥